Renga Architecture 2. . 4
The new release implements important requests from users, among them separate views of individual objects (such as columns, beams, windows, and doors), an update to the display style dialog box, and a way to locate offset columns and beams.
This update provides architects and designers with greater options in showing models in drawings the way they want, making Renga Architecture more flexible.
Display Individual Objects
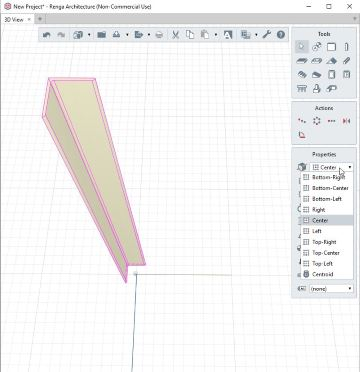
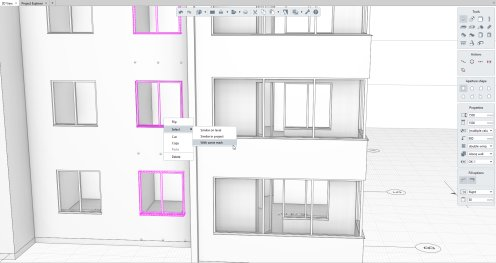
To get views of columns, beams, windows, doors and other objects, Renga Architecture 2.4 now lets you mark objects and then choose them from the object list to place them in draft view. Architects had asked for this function, because their clients were requesting layouts of, for instance, all windows with their different sizes, which could then be sent on to production.While it was possible in previous releases of Renga to display individual objects with the help of views – section, front, or plan – then clipping the view to isolate the object, this process was inconvenient and did not necessarily prevent other objects from appearing in the clipped view.
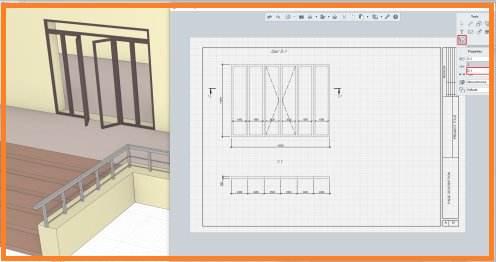
The new Renga 2.4 places selected objects in draft view in just two clicks, after marking the desired objects. When placing the object in draft view, you choose a view – front, top, right, and so on – as well as the scale of the object. Just locate the individual objects in the draft view and then specify their plot size.
This new feature is useful for designers in many ways, such as placing reinforced objects and rolled metal objects (stands, beans, trusses, and so on) separately from one other
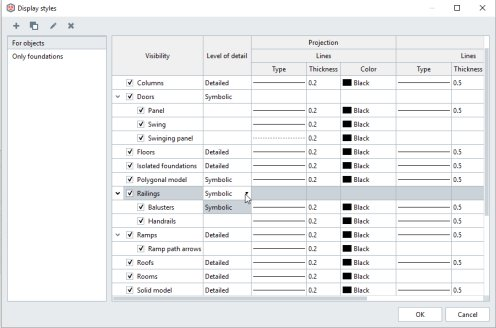
Object Display Styles
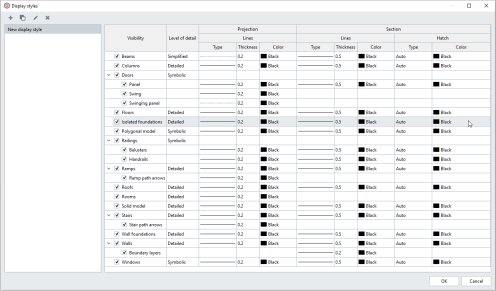
In Renga 2.4, it is now possible to set the visibility of individual objects in each view through the following properties:
- Display style
- Level of detail
- Properties for projections and sections
Previously, users could not adjust view styles, and there was only visibility of objects on view. Now you can set styles for yourself, and add a level of detail. The view can be adjusted in draft view the way architects and designers want it. For example, you can set different levels of detail, so that in the same view on different drafts objects are reflected in different ways.
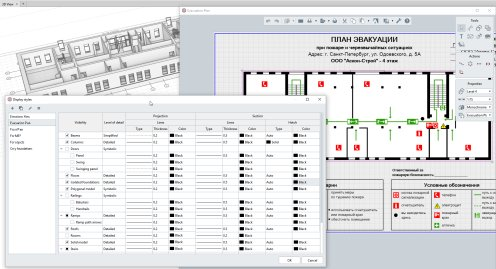
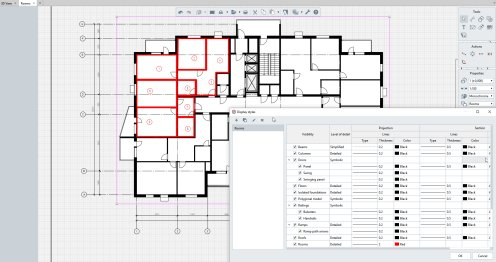
For example, to develop an evacuation plan with Renga, hide all objects other than the needed walls, windows, doors, and staircases and then assign thickness, line type, and color to the lines as needed. To display only the walls, partitions, and doors on a floor plan, all you need to do is to adjust the visibility of the objects; by changing object visibility, you hide objects in the view.
Levels of Detail. By assigning a level of detail (LOD), you adjust the display complexity of objects displayed in views. While currently there is only one variation in LOD, in the future more levels of detail will be added to Renga Architecture.
Projection Properties. When adjusting projections of objects, you can assign thickness, type, and color of lines to objects that are displayed in draft mode.
Section Properties. In changing properties of objects in section views, you can set the display of line thickness, type, and color, as well as specify the hatch pattern of sectioned objects.
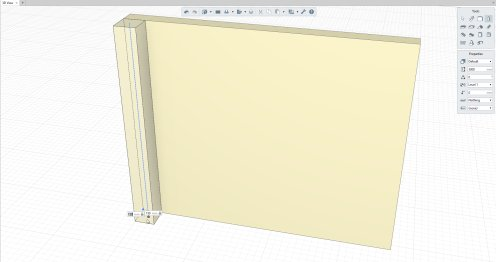
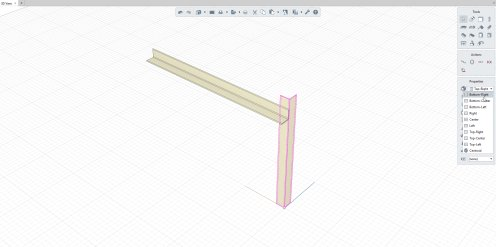
Placing Offset Columns and Beams
Being able to specify the locations of columns and beam relative to their axes gives architects greater flexible in placing them with existing objects in models. Instead of moving columns or beams in the model, Renga 2.4 lets you move the axis in columns and beams, choosing from a list the required displacement. That allow you to insert them off-center.
When an architect, for example, needs to locate columns along walls, previously he had no other way than to take column's center section, apply object linking, do some mental arithmetic, and then determine the column's half section. Using this approach to place columns in the right location isn't convenient and is pretty slow!
In Renga Architecture 2.4, you move the column centers, and then locate them in the model. Fast and easy!
This new function is useful not only for architects, but also for engineers and designers in making the design process faster in areas such as rolled metal products.

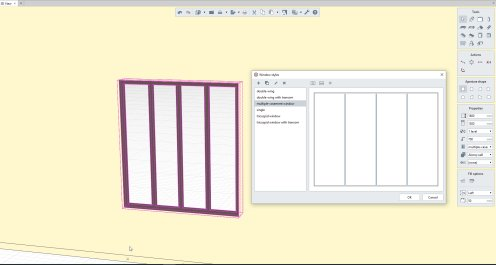
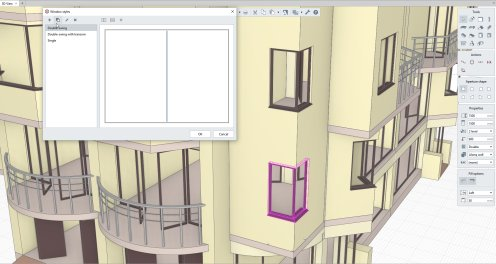
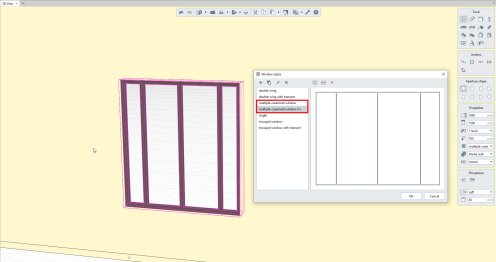
Duplicating Styles
The style editor in Renga Architect 2.4 now duplicates styles, which is a more convenient way to create variations of windows, doors, columns, and even text. This new function copies an existing style, and then lets you edit it.
In an architectural project which, for instance, has four-casement windows with equally-spaced casements, the client wants different kinds, such as ones with two narrow outer casements. Prior to v2.4, architects needed to create a whole new style, but now Renga can duplicate any existing object style and then let you adjust it, such as changing the widths of window casements.
Expanded Marking
Renga Architecture 2.4 expands marking beyond just choosing objects for draft views. With the help of assigned marks, it now chooses all objects with the same mark automatically.
Previously, choosing similar objects required that all their properties fully matched, which an is inconvenient method. As users wanted to a way to automatically choose objects by mark, the context menu now offers the “With the same mark” option.
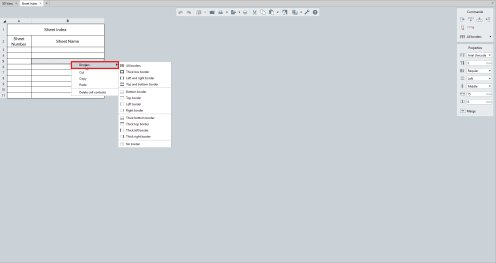
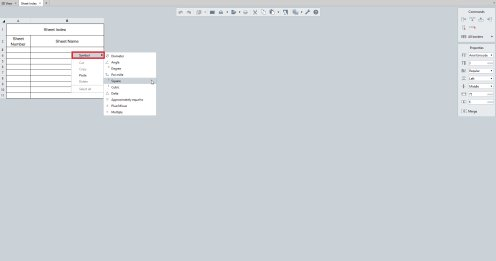
Enhanced Tables.
Now it's possible to insert special symbols into table cells via the new Symbol option. To use this command, you click on a cell, and then use context menu to choose the symbol you wish to insert.
The new Borders option adjusts the look of borders around selected cells. Since this new function is called from the context menu, you save time and avoid unnecessary mouse movement.
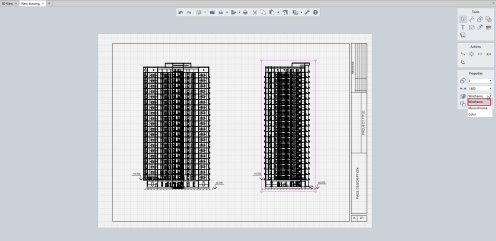
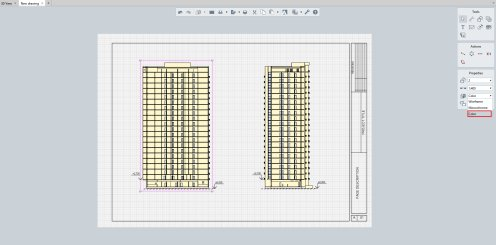
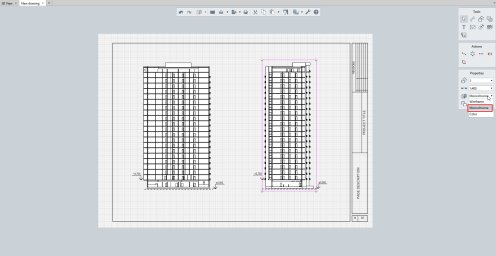
New Visual Styles.
The next step in renderings models with Renga Architecture 2.4 is visual styles for draft views. Previously, visual styles were available only in 3D views, but now visual styles are available in three versions – wireframe, monochrome shaded, and color shaded – to make draft views more informative.
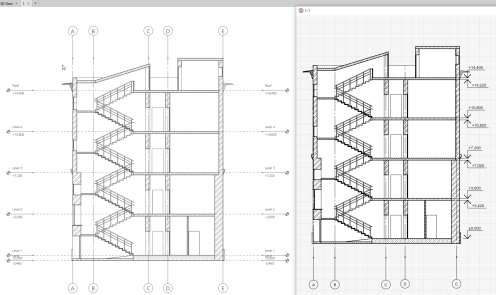
Section Hatches. Also new in Renga Architecture 2.4 is the ability to hatch objects that are cut in section views. Hatching is applied automatically to objects on a single layer. For multi-layer construction, the hatch is taken from the primary layer's properties.
BIM Exchange. Renga Architecture supports BIM (building information modeling), and so development continues to exchange data with other information modeling systems through the IFC (industry foundation classes) file format.
Renga 2.4 adds localized names of the objects for IFC export, which helps to more easily identify objects without need to check their properties. This improves compatibility with other IFC-complient applications.